Learn everything you need to know about 3D printing, from how it works to how to print your first 3D file. Discover the many benefits of using a 3D printer, including customization, cost-effectiveness, rapid prototyping, and education.
Introduction: 3D printing is a cutting-edge technology that allows you to turn digital designs into physical objects. It has been gaining in popularity in recent years as the technology has become more affordable and accessible. In this comprehensive guide, we'll explore what 3D printing is, how it works, how to print your first 3D file, and the many benefits of using a 3D printer.
What is 3D Printing? 3D printing, also known as additive manufacturing, is a process of creating three-dimensional objects by layering materials on top of each other. It is achieved using a 3D printer, which follows instructions from a digital file to build up the object layer by layer.
3D printing technology has come a long way since it was first invented in the 1980s. Today, it is used in a wide range of industries, including aerospace, automotive, medical, and education.
How Does 3D Printing Work? The 3D printing process starts with a digital file, which is created using 3D modeling software. The file is then sliced into thin layers, and the 3D printer reads these layers as instructions to build up the object layer by layer.
To build the object, the 3D printer melts a material, such as plastic, and extrudes it through a nozzle. The nozzle moves back and forth, building up the object layer by layer until it is complete.
There are many different types of 3D printers, and they can use a variety of materials, including plastic, metal, and even organic materials like tissue.
How to Print Your First 3D File To print your first 3D file, you'll need a 3D printer, 3D modeling software, and a 3D file. Here are the basic steps to get started:
-
Create or download a 3D file: You can create your own 3D file using 3D modeling software like Tinkercad or Fusion 360, or you can download one from online repositories such as Thingiverse or MyMiniFactory.
-
Slice the file: Use a slicing software such as Cura or PrusaSlicer to slice the file into thin layers. This step is important because it tells the 3D printer how to build the object layer by layer.
-
Set up the printer: Load the sliced file onto your 3D printer and make any necessary adjustments to the printer settings. This can include setting the print speed, temperature, and layer height.
-
Print the object: Start the printing process and wait for the object to be printed. Depending on the size and complexity of the object, this can take anywhere from a few minutes to several hours.
Benefits of Using a 3D Printer
-
Customization: One of the main benefits of 3D printing is the ability to create custom objects that are tailored to your specific needs and preferences. Whether it's a replacement part for a machine or a one-of-a-kind piece of jewelry, 3D printing allows you to bring your ideas to life.
-
Cost-effective: 3D printing can be more cost-effective than traditional manufacturing methods, especially for low-volume production runs. This is because 3D printing eliminates the need for expensive tooling and molds.
-
Rapid Prototyping: 3D printing allows you to quickly produce prototypes, test designs, and make changes before finalizing a product. This can save time and money in the product development process.
-
Educational: 3D printing can be used in education to teach students about design, engineering
Here are some popular 3D printers available on the market:
-
Prusa i3 MK3S+: This open-source 3D printer is known for its reliability, ease of use, and high-quality prints.
-
Creality Ender 3: The Ender 3 is a budget-friendly 3D printer that offers great value for its price. It has a large build volume and is a popular choice for beginners.
-
Ultimaker S5: This high-end 3D printer is known for its precision and large build volume. It is often used by professionals for prototyping and small-batch production runs.
-
Formlabs Form 3: The Form 3 is a resin-based 3D printer that produces high-quality, detailed prints. It is often used in dental and medical applications.
-
MakerBot Replicator+: The Replicator+ is a user-friendly 3D printer that produces high-quality prints. It is often used in education and small businesses.
-
FlashForge Creator Pro: This dual-extruder 3D printer is a popular choice for enthusiasts and professionals. It has a sturdy build and produces high-quality prints.
-
LulzBot TAZ 6: The TAZ 6 is a versatile 3D printer that can print with a wide range of materials. It has a large build volume and is often used for prototyping and small-batch production.
These are just a few examples of the many 3D printers available on the market. When choosing a 3D printer, it's important to consider factors such as your budget, intended use, and desired features.
some more information about the file types used for 3D printing:
-
STL (Standard Tessellation Language): STL is the most widely used file format for 3D printing. It describes the surface geometry of a 3D object using a series of interconnected triangles, and can be generated from a wide range of 3D modeling software. STL files are often used in combination with slicer software to generate Gcode, which is the machine language that tells the 3D printer how to build the object.
-
OBJ (Object): OBJ files are commonly used in 3D modeling and animation software, but can also be used for 3D printing. Unlike STL files, OBJ files include information about color and texture, as well as surface geometry. However, this additional information can make the files larger and more complex than STL files.
-
3MF (3D Manufacturing Format): 3MF is a newer file format that is designed specifically for 3D printing. It includes information about color, material, and other properties of the printed object, and can be used to store multiple objects in a single file. 3MF files are often used in combination with slicing software that supports the format.
-
AMF (Additive Manufacturing File Format): AMF is a newer file format that is designed to be more versatile than STL. It can include information about multiple materials and textures, as well as support for more complex geometry. AMF files can also include information about the orientation of the object during printing, which can help to minimize the need for support structures.
-
Gcode: Gcode is a machine language that tells the 3D printer how to move its extruder head and build the object. Gcode files are generated from 3D models using a slicer software. Slicer software converts the 3D model into a series of layers, and generates instructions for the 3D printer to move its extruder head to build each layer. Slicer software allows users to adjust settings such as layer height, print speed, and infill density, which can affect the final print quality.
In summary, STL is the most commonly used file format for 3D printing, but other file formats such as OBJ, 3MF, and AMF are also used. It's important to check the specifications of your 3D printer to ensure that it supports the file format you want to use. Slicer software is used to convert 3D models into Gcode, which is the machine language that tells the 3D printer how to build the object.
The cost of 3D printers can vary greatly depending on the features, build quality, and brand. Here's a detailed overview of the different price ranges and what you can expect for each:
-
Budget 3D printers: These printers typically cost between $200 and $500. They are often small and have limited features, but can still produce decent quality prints. They are great for beginners or for those who want to try out 3D printing without making a large investment.
-
Mid-range 3D printers: These printers typically cost between $500 and $2000. They offer more features and larger build volumes than budget printers, and often have higher quality components. They are a good option for those who want to produce higher quality prints or need a larger build volume.
-
Professional 3D printers: These printers can cost anywhere from $2000 to $10,000 or more. They are designed for use in professional settings such as engineering firms, architecture firms, or manufacturing facilities. They offer advanced features such as multiple extruders, larger build volumes, and higher quality components.
-
DIY 3D printers: DIY 3D printers can be purchased as kits or assembled from scratch using open source plans. The cost can vary greatly depending on the quality of the components used and the complexity of the build. DIY printers are a good option for those who want to learn more about 3D printing and are willing to invest time and effort into building their own printer.
It's important to keep in mind that the cost of a 3D printer is just the beginning - there are also costs associated with materials, maintenance, and upgrades. For example, the cost of 3D printer filament can range from $20 to $100 or more depending on the type and quality. Additionally, some printers may require regular maintenance or upgrades to keep them running smoothly.
Overall, the cost of a 3D printer can vary greatly depending on your needs and budget. It's important to do your research and consider factors such as build volume, print quality, and features when selecting a printer. Additionally, it's a good idea to factor in the ongoing costs of materials and maintenance when budgeting for a 3D printer.
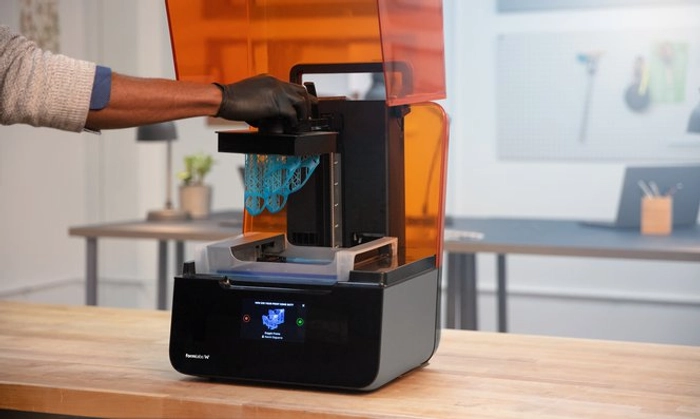
WHAT IS RESIN
- Resin 3D printing uses liquid photopolymer resin as the printing material.
- The resin is cured layer by layer using UV light to create highly detailed and precise 3D prints.
- Resin printing is commonly used in fields such as jewelry making, dentistry, and product prototyping.
- It's often used to create highly detailed and intricate parts, such as dental molds, figurines, and small-scale art pieces.
- Resin printing can also be used to create functional parts with smooth surface finishes and tight tolerances.
- One of the main benefits of resin 3D printing is its ability to produce highly detailed and precise prints with smooth surface finishes.
- Resin prints are often more durable and have better dimensional accuracy than prints made with other materials such as PLA or ABS.
- Some popular resin brands include Formlabs, Anycubic, Elegoo, and Siraya Tech.
- Resin can be purchased directly from the manufacturer or from third-party retailers such as Amazon or 3D printing supply stores.
- However, working with resin can be messy and requires proper safety precautions.
- Resin can emit fumes and should be used in a well-ventilated area, and protective equipment such as gloves and goggles should be worn when handling uncured resin.
The future of 3D printing in the jewelry busines
-
Complex and Intricate Designs: 3D printing technology allows jewelry designers to create intricate designs with ease, opening up a world of possibilities for unique and beautiful jewelry creations. With traditional jewelry making techniques, creating complex designs can be time-consuming and difficult, but 3D printing makes it easier to create intricate designs.
-
Customization: 3D printing makes it possible to create custom designs based on a customer's specific requests. This means that jewelers can create one-of-a-kind pieces that are tailored to each individual customer, providing a unique and personalized experience. With 3D printing, customers can be involved in the design process, making it more collaborative and engaging.
-
Reduced Waste and Improved Efficiency: Traditional jewelry making techniques often involve a lot of material waste, as well as time spent on manual labor. With 3D printing, designs can be created digitally, reducing the amount of material waste and saving time in the production process. This can lead to cost savings for both the jeweler and the customer.
-
3D Printed Molds: 3D printing can be used to create molds for casting metal or other materials. This allows jewelers to create intricate designs that would be difficult to create using traditional molding techniques. 3D printed molds can also be reused, making them a cost-effective solution for creating multiple pieces.
-
Wax Models: 3D printing can be used to create wax models, which can be used to create metal castings for jewelry production. This allows jewelers to create prototypes and test designs before casting them in metal. This can save time and reduce material waste, as well as improve the overall quality of the final product.
-
Direct Metal Printing: 3D printing can be used to create finished jewelry pieces, with the ability to print directly in metal or other materials. This allows jewelers to create intricate and complex designs that would be difficult or impossible to create using traditional jewelry making techniques.
-
Design Flexibility: 3D printing allows for more design flexibility than traditional jewelry making techniques. With 3D printing, designs can be modified easily, allowing for quick changes and revisions. This can be especially useful for custom designs or for designs that are being created for a specific occasion.
Overall, the future of 3D printing in the jewelry business looks bright. With its ability to create complex and custom designs, reduce waste and improve efficiency, 3D printing is poised to revolutionize the way we make jewelry. Whether you're a jewelry designer or a customer looking for a unique and personalized piece, 3D printing has the potential to change the way we think about jewelry making.